Hello everyone,
Today I am going to show you to you can create really simple yet gorgeous Christmas decorations for your home. The joy of this ‘how to’ is that is not just limited to Christmas. These paper flowers can be used for weddings, birthdays, and even a lovely addition to brighten up the home/school room or nursery room. You will see on our website we have such a large range of tissue paper there is no excuse not to try this craft at least once! I have kept this one simple (because 1. I am a novice crafter and 2. I wanted this to be a crafty activity for children as well).
You can find more complex methods of creating bouquets and origami on our other blog post simply by clicking here.
Now for the How To:

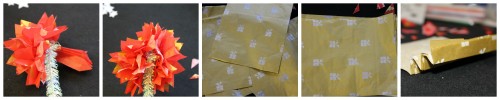
1) Collect your materials. I chose the Festive Tissue pack because I like the diversity of colours and patterns and the curly iridescent stems simply because they look Christmassy and gorgeous. I created 3 flowers but you can create however many you like.
2) Cut out 4 rectangles of the tissue paper (depending on how large you want the flowers will depend on how big you cut the rectangles) I cut mine approx 10cm x 12cm.
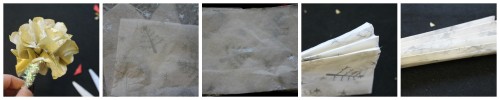
3) Next you will need to lay them on top of one another and fold as if you are folding a fan
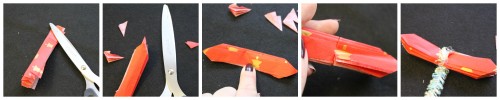
4) Take your scissors and trim the two ends (for this flower I chose to go with a pointed end)
5) Make two cuts in the middle (be careful not to snip right through the paper)
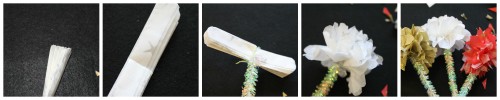
6) Take your iridescent stem and wrap it round where you have just made the incisions. The stems I have picked are thick and sturdy so will only need to be wrapped around once.
7) THE FUN BIT! Start to unfold the tissue on both sides and see your flower start to take shape.
8) Repeat steps 2-7 for the other flowers you want to make (for the gold paper I decided to do a more rounded edge to the flower)

9) Once you have made all the flowers you want you can them trim the stems (if you like)
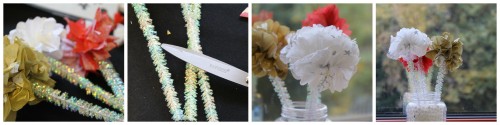
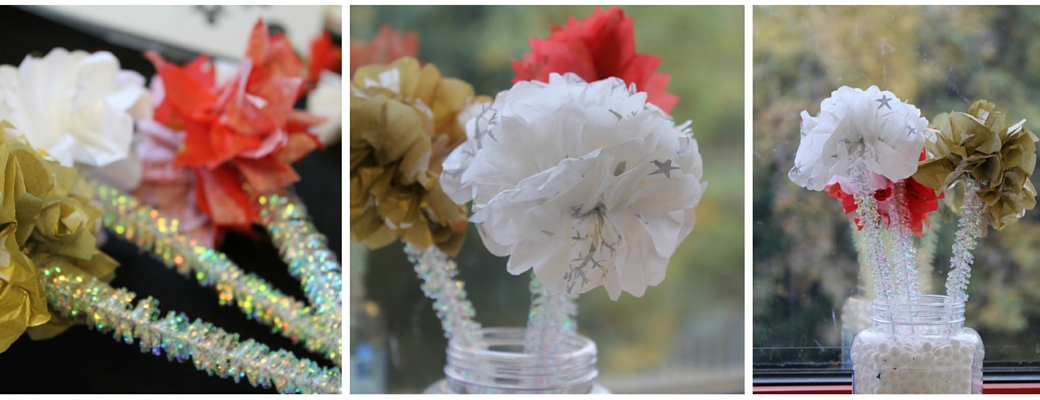
10) Then you decide where you are going to put them. I used an old shaker jar filled up with our glitter snowballs for that extra Christmassy effect
Then your beautiful paper flowers are ready to be placed where everyone can see them.
I hope you enjoyed this how to.
Until next time – stay creative!
The Bright Ideas Team x