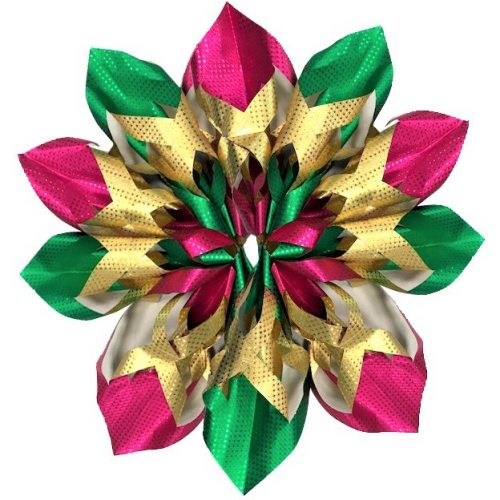
Day 4 of our 12 Crafts of Christmas posts and this one is cooler than a polar bear’s toenails. This lovely 3D Snowflake looks pretty tricky to tackle but is actually really simple. What’s more, you can use your favourite coloured paper to make a real impact with your finished decoration. It’s inexpensive to make and packs a real punch in the decoration stakes at home, in the office or in the classroom. So what are you waiting for? Get snipping…..
You will need:
- Selection of paper (we used a selection from our Festive Craft Papers Bundle) x 10 sheets
- Scissors
- Stapler
- Sticky tape
- Pencil and ruler (to accurately trim paper sheets into squares)
Instructions:
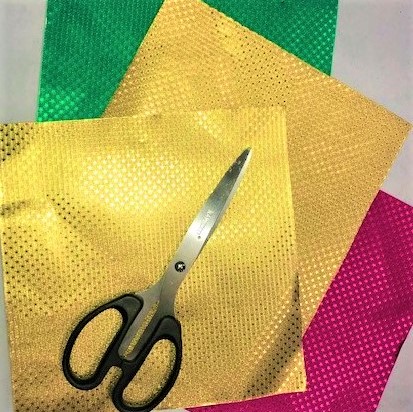
- First select a range of paper you would like to use for your snowflake. We have chosen metallic paper in a range of colours from our Festive Craft Papers Bundle. Our selected paper has a different colour on each side. We have selected gold/green and gold/pink combinations.
- Cut each piece of paper into a square – ensuring all squares are the same size.
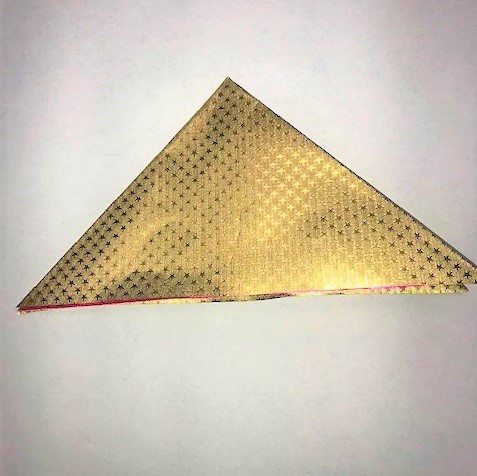
- Now fold each sheet of paper in half diagonally and in half again (diagonally) to form a triangle
(as shown above).
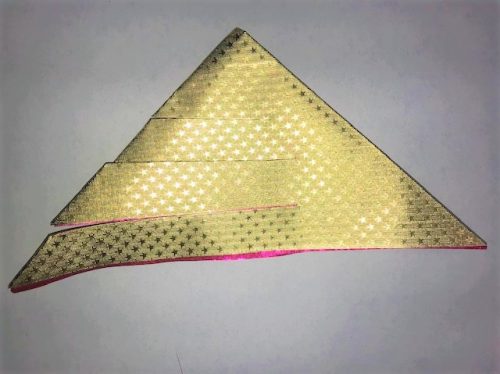
- Take each triangle in turn and make three cuts across the length of the triangle (from the folded, not outer) edge. Ensure your cuts do not run the entire width of the paper.
- The image below shows you how this should look once each leaf of paper has been cut and opened out.

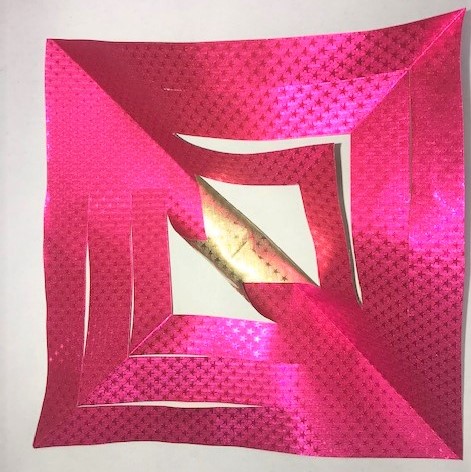
- Now take your first sheet of paper and open it out (as above). You will see an inner square shape has been formed by the scissor cuts. Roll the first two innermost paper corners together to form a tube shape (as shown below) and fix this together with a small piece of sticky tape. You will see ours is gold coloured (as our paper features a different colour on each side).
- Once you have stuck this, turn over your piece of paper and do the same to the next inner square – again securing this with sticky tape.
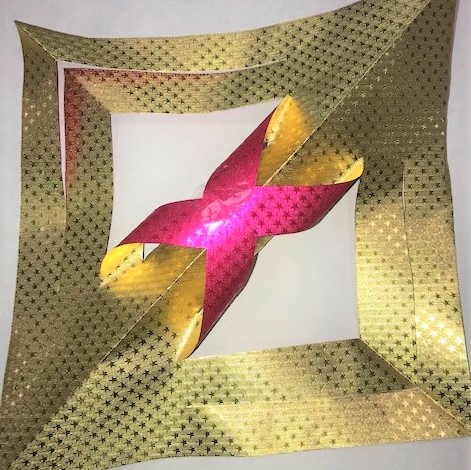
- Repeat this process until you have folded back all the squares and are left with a similar shape to that in the below image.
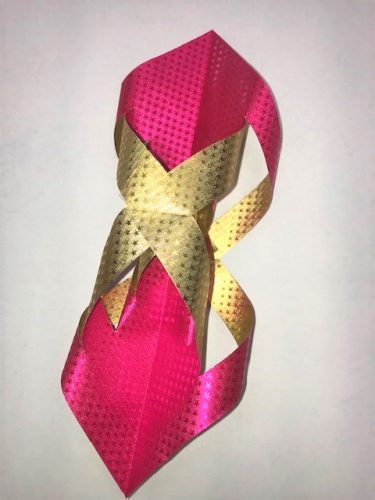
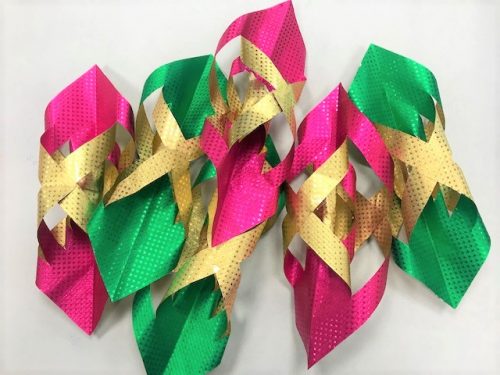
- Repeat this process with each of your sheets of paper (as below).
- Now you have the components of your snowflake, it’s time to fix them together.
- Gather three of the completed rolled pieces together at one end and staple them together using your other hand. Repeat this with the next three pieces. Now you should have two pieces consisting of three strands (or arms) each.
- Once you have done this, staple the two new pieces together in the middle (as below).
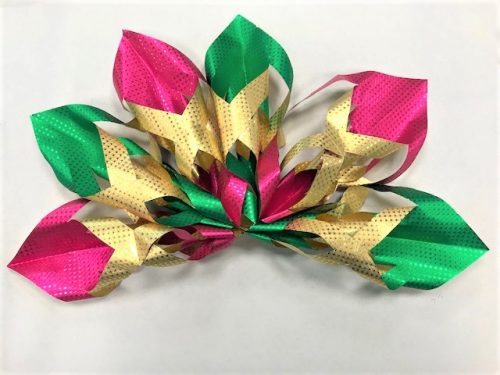
- To prevent the snowflake from moving too much, staple where each of the six arms meet. This will ensure the snowflake shape is pulled into place.
- Repeat the above steps with the remaining snowflake ‘arms’ and fix these to the first half to create your finished snowflake.
- All that’s left to do now is to fix a loop of ribbon to the top of your snowflake and hang it up!
Don’t forget to check out tomorrow’s Bright Craft idea!