The countdown to Christmas begins! Welcome to Day 1 of our 12 Crafts of Christmas where we will be bringing you 12 festive crafts that you can try out at home. To kick start the festivities, why not try making this cute angel tree decoration? Your kids will love personalising her with their own photographs, glitter, sequins and pom poms.
You will need:
- 2 x pieces of paper (we have used glittery paper)
- 1 x glittery pipe cleaner / stem
- PVA glue
- Piece of card for the angel’s face
- Pen or pencil
- Length of festive ribbon
Instructions:
- First, you will need to make the wings and skirt for your angel. To do this, take one piece of paper and fold it like a fan horizontally. This will form the wings of your angel.
- Now fold your second piece of paper vertically producing a longer fan shape. This piece of paper will be the skirt.
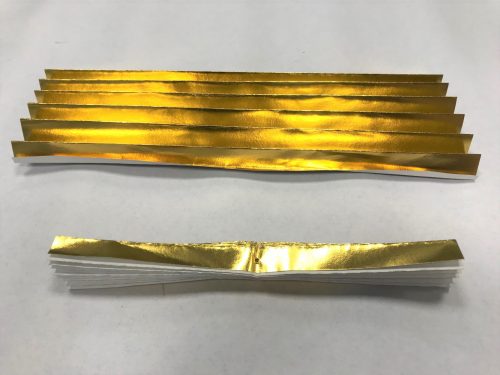
- Fold both fan shapes in half, producing a centre fold.
- Using a sharp pencil or pair of scissors, carefully make a hole in the centre fold of both of your fan shapes and push through your pipe cleaner/stem.
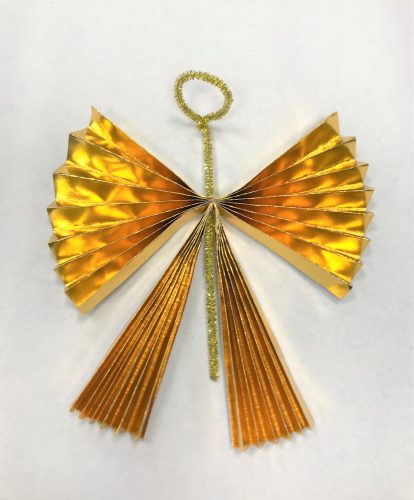
- Ensure you have approx. 8-10cm of pipe cleaner/stem visible at the top of your angel and twist this into a circle to form a halo.
- Using your PVA glue, fix together the bottom of your angel’s wings to either side of the skirt.
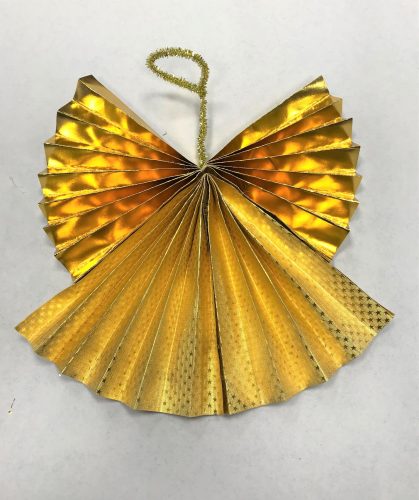
- Now cut out a small circle from your piece of card and draw a face for your angel. You can use wiggly eyes or draw your own.
- Stick the face to the pipe cleaner, just below the halo and adjust the halo so it is positioned above the angel’s head.
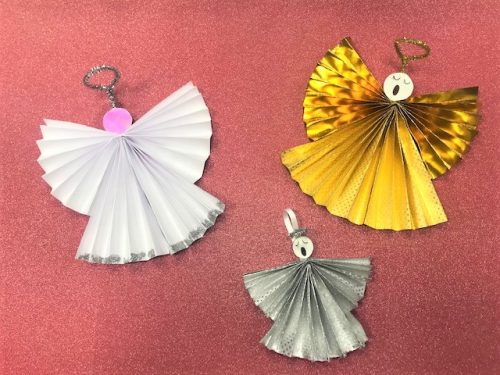
- Finally, form a loop of festive ribbon and fix this to the back of the angel’s head so that your decoration can be hung from the tree.
Variation:
For a personal touch, why not use a photograph of a friend or family member’s face to glue to your angel and give the finished decoration to them as a special festive gift?
Don’t forget to check out tomorrow’s Bright craft idea!