Unless you’ve been living under a rock these last few weeks, you’ll know there’s a very big European football tournament on at the moment! Euro 2016 is well underway and our favourite local crafting expert, Michelle from The Crafty Foxes, has come up with a wonderfully simple yet effective way to celebrate this tournament – make your own Euro football shirts!
Create your very own football shirts and even a whole team – just decide whether you want a team all from the same country or want to mix it up with a range of shirts from different countries. With 24 teams taking part, there’s nothing stopping you and your family (or classmates if you’re doing this in a school) making a shirt from each country so you’ve got the whole complement of shirts, but it’s totally up to you!
Below is a step-by-step guide on how to make your origami football shirts. They’re not overly complicated but will need a bit of patience and time…
For this make we’ve used paper and card from our big value craft papers bundle which contains over 540 assorted sheets of craft paper and card, but you can use whatever card you’ve got access to – just pay attention to the colours of the flags and make sure your card is as close a match as possible!
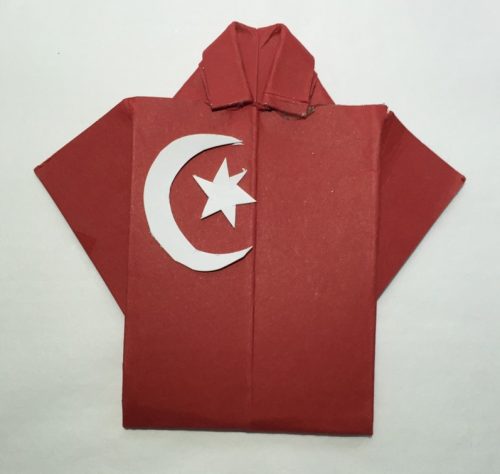
Here’s a reminder of what we’re aiming to end up with – in this instance we’ve highlight the Turkey shirt as it looks awesome with the detailing:
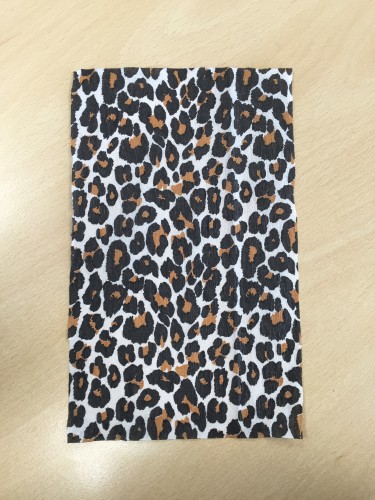
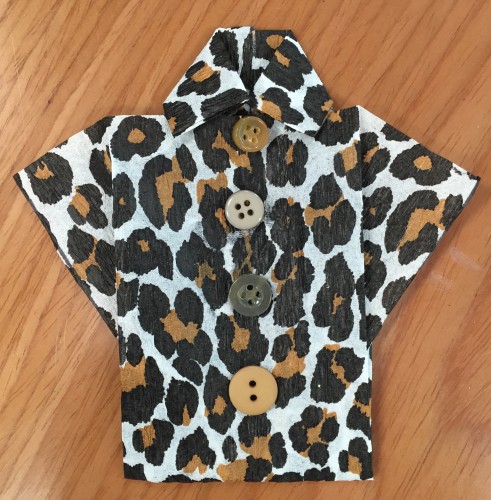
Another point to note… we recently posted instructions on how to create these origami shirts for Father’s Day ideas, so rather than reinvent the wheel, we’ve copied and pasted the step-by-step guide for that shirt below, which does mean that you’ll see lots of leopard print below! The principles for making your Euro football shirts are exactly the same, so rather than focus on the leopard print pattern itself, follow these steps to end up with your perfect football shirt:
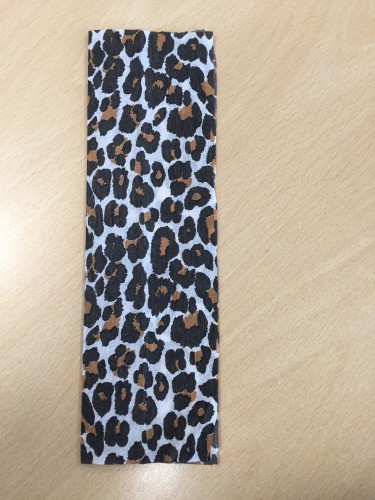
Cut out a rectangle from your chosen paper type, to measure 13cm x 21cm:
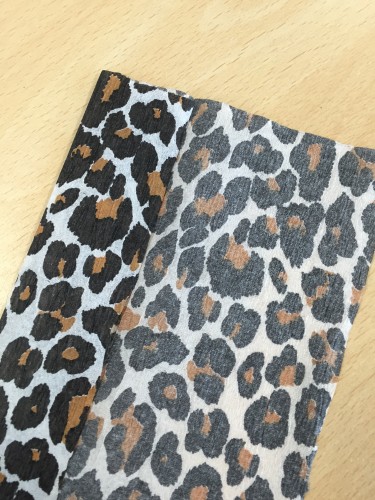
Once you’ve done that, fold the paper in half lengthways:
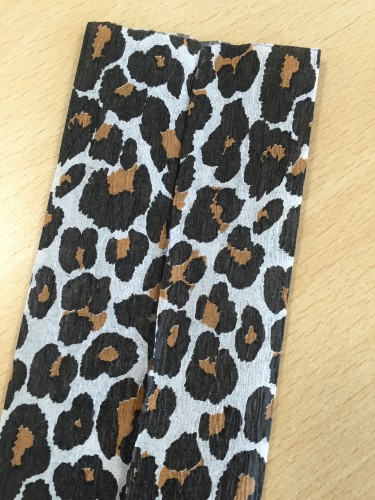
Turn the paper over and fold each half in half again, still going lengthways:
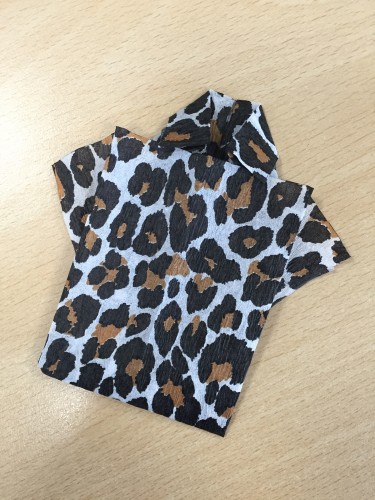
Your sheet should now look like this:
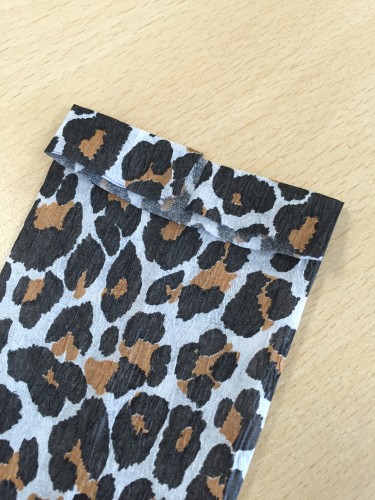
Turn the paper over once more once that’s been done and fold the top down towards you. Fold approximately 1cm down:
Turn the paper over again and bend in the corners towards the middle crease as shown below (this forms the collar of the shirt):
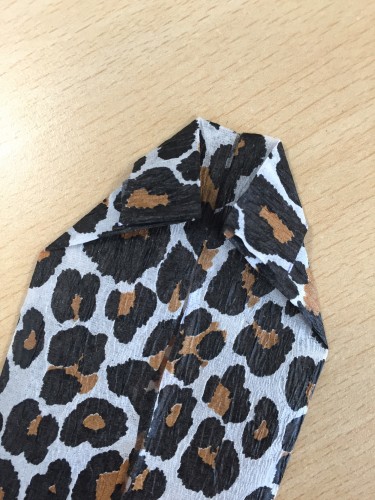
Once you’ve done that on both sides, fold the bottom up and tuck it underneath the collar:
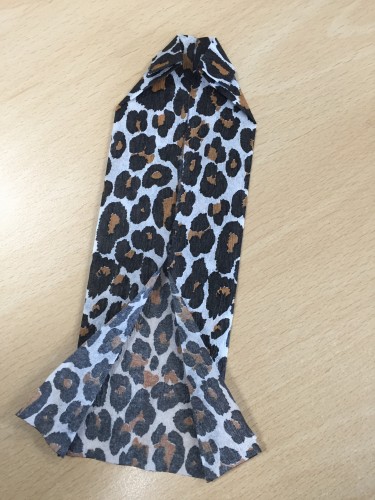
You’re almost there! Next step is to unfold the bottom section (effectively undoing the above step) and then using the newly creased middle as a guide, fold out the sheet from the middle to the bottom outside corners (this is to make the sleeves). The picture below explains this a bit better:
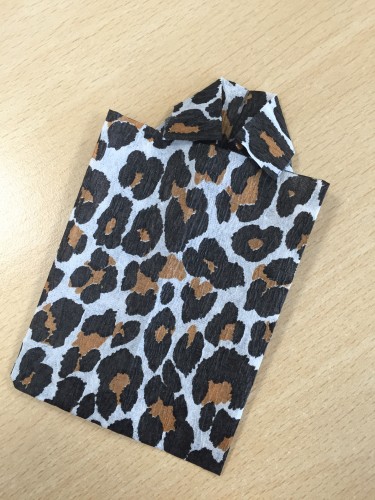
Then the penultimate stage is to fold it back up so the bottom half is tucked underneath the collars (same as two steps ago but this time the sleeves will be prominent):.
And then all that’s left is to add buttons! We’ve taken these from our assorted pack and then glued them in the middle of the shirt to end up with this finished origami shirt:
But of course, by this stage you’ll be staring at a half finished football shirt! Using the Turkey shirt example, if you’ve followed all of the above steps using red card instead of leopard print material, then all you’ll need to do is is cut out a crescent moon and star shape before sticking these to the shirt itself.
With the England shirt and other shirts with crosses on for example, start with white card, follow the instructions above, and when the shirt has taken shape, cut out and stick on two thin red strips of card to make the cross and to finish off the flag. You might need to give a little bit of thought to your Euro football shirts before starting out, just to make sure you can make the right flags and are using the right colours. In the example of the German shirt, it’s been created with a black card and the middle red and bottom yellow have simply been created by measuring and cutting out rectangles of the right size and then sticking them on top of the black card.
And that’s it!! Handmade Euro football shirts for all the family or classroom to make and enjoy!
Until next time, keep crafting!!
The Bright Ideas Team & Michelle from The Crafty Foxes x