
O’ Christmas tree, O’ Christmas tree! This make for day 9 of our 12 Crafts of Christmas is a little fiddly to make but we think well worth the effort. Your finished tree can be decorated with beads, tinsel, bells or pom poms to create a really cute table top decoration for your home or workplace.
You will need:
- Green pipe cleaner stems (we used our Extra Wide Chenille stems)
- Scissors or wire cutters
- Floristry wire or strong pipe cleaners (we used our Curly Iridescent Pipe Cleaners)
- A pot to stand the tree in (we used one of our Decorative Christmas Boxes)
Instructions:
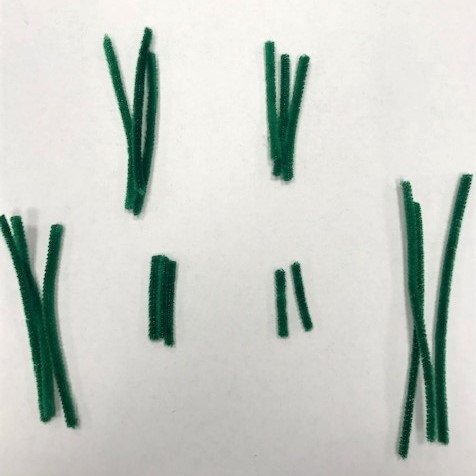
- With scissors or wire cutters, cut two 1 inch pipe cleaner stems and three 2, 3, 4, 5 and 6 inch stems.
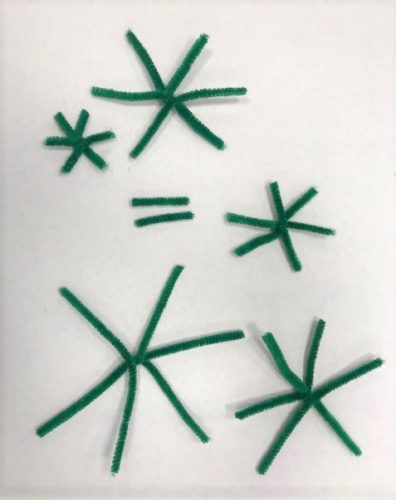
- Twist each group of three sticks together at the centre point to create six pointed stars. Now twist the two smallest stems into a cross shape.
- Now you need to begin adding branches to your stars. Begin with the largest star and starting from the centre of each spoke, twist on 2 x 2.5″ stems and tighten them to prevent them from shifting. Follow on with a 2″ stem and then a 1.5″ stem. Try to keep your spacing evenly distributed.
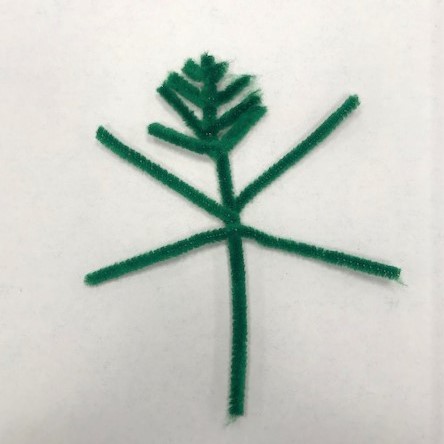
- Your finished star should now resemble a snowflake (see below).
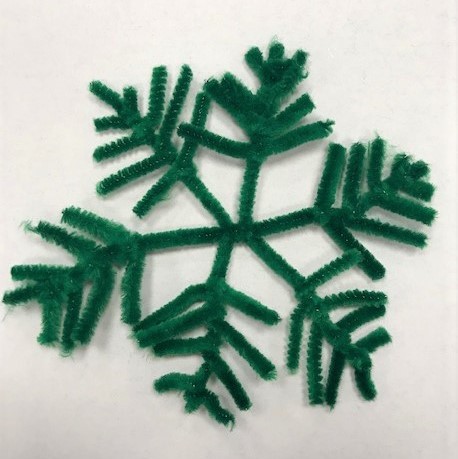
- Repeat this process on the other stars with the following sized stems: For the 5″ star use: 6 x 2.5″ stems, 6 x 2″ stems and 6 x 1.5″ stems. For the 4″ star use: 6 x 2″ stems and 6 x 1.5″ stems. For the 3″ star use 6 x 1.5″ stems. For the 2″ star use 6 x 1″ stems.
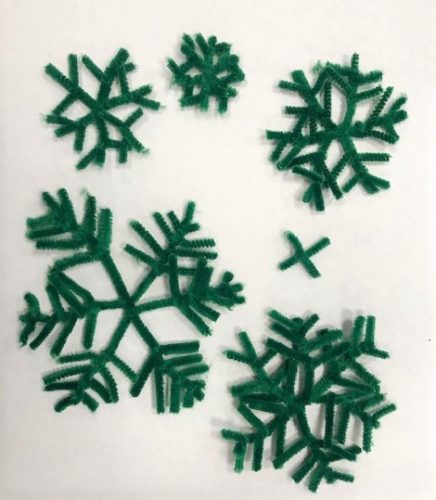
- You should now have x 5 completed (snowflake) shapes and a small pipe cleaner cross (as above).
- The next stage is the tricky part. You will need either a length of floristry wire or a stronger pipe cleaner/s (we used our Curly Iridescent Pipe Cleaners Stems here) as this will form the main trunk of your tree so needs to be sturdy.
- You now need to begin building your tree starting from the bottom with the largest snowflake. Wrap the floristry wire around the centre of the large snowflake. Ensure there is some excess wire at the bottom of this as you will need the surplus to stand the tree in a pot.
- Now take the next biggest pipe cleaner snowflake. This will form the next layer of your Christmas tree. Again, wrap the wire around the centre of this snowflake (with no more than a 1″ space between this snowflake and the first one). This will ensure your finished tree doesn’t look too sparse. Once the wire has been wrapped around the centre of this snowflake and is secured above the first, do the same with the remaining snowflake shapes.
- Continue this process with all the stem snowflakes until you reach the top.
- Then secure the small pipe cleaner cross-shape onto the top of the tree.
- You will probably need to spend some time adjusting and straightening your tree so you are happy with the branches.
- Once you are happy with how your tree looks, it’s time to decorate the base.
- For our base we have used one of our Decorative Photo Boxes and have tacked a blob of Blu Tac inside the bottom of the box so that the tree stem stays in position.
- You can decorate your box base with tinsel, ribbon, sequins or glitter to make it look more festive.
- Once you are happy with your box, make a hole in the top and push the base of your tree through it. Push the tree down into the Blue Tac to secure it in place.

- We decorated our finished tree with some red tinsel and snow spray.
Don’t forget to check out tomorrow’s Bright craft idea.