Bright Ideas’ new years hopes and wishes balloons are a great low mess, low fuss make, you need very few materials to create this and is a brilliant way to bring the new year in with the kids. Try this new year craft project in the classroom or at home.
What materials will you need?
-Pens/ pencils
-Glue
-String
There are so many ways to modify and interpret this new year make, we don’t know where to begin! This is a great tool to inspire and encourage self assessment, as well as promoting the desire to achieve in the new year.
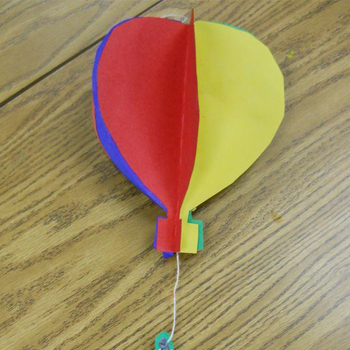
We made our balloons three sided, this allowed us to identify 3 key areas to focus on, ‘what my strengths are’, ‘what I enjoy most’ and ‘what I want to achieve this year’. Of course this can be modified to a flat balloon and even more sides could be added to make this make more complicated.
Step 1- Create a stencil for your balloons so that they are all the same size when you stick them together.
Step 2- Draw around your stencil onto paper and cut balloon shapes out in different colours.
Step 3- Write the titles: ‘what my strengths are’, ‘what I enjoy most’ and ‘what I want to achieve this year’ on one balloon shape each, then underneath personalise with your own answers.
Step 4- For this part you can either print out a picture of yourself or draw your own and cut it out.
Step 5- Cut a length of string to attach your picture to the balloon. This is done by concealing each end between the paper of your balloons.
Step 6– To stick your balloons together, fold the balloons in half, then unfold. Glue the back of the balloons and stick together half a balloon at a time. Making sure that you add in one end of the string (use some sticky tape to secure if you need to).
Step 7- Attach the other end of the string to your picture, do this by sticking the string down with some sticky tape on a piece of thick card. Then glue the back of your picture and sandwich the sting together with the card. Trim as needed.
Some variations on this method are: attaching the balloons from the ceiling, you could even add in some cloud shapes to make the display extra special. You could use the balloons as an interactive display, using the balloons to go up when the child makes progress.
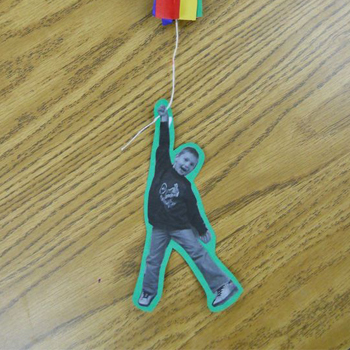
Another fun thing to do with this make is add the pictures of your students themselves, the photos should be taken to look like the student is hanging to to the piece of string, so your students will need to strike a pose for the camera, you can then print these out and use for your project.
To make the activity last longer, you could add extra elements like decorations for your balloons, streamers and you would even make little baskets to hang from the balloons!
images from: http://ideas.tpet.co.uk/flying-high-balloons/